These mummy hot dogs have become our go-to Halloween treat every single year. I started making them when my youngest was 5, and now at 12, she still insists we make a batch for her school party. Trust me, when you see kids giggling while they add mustard dot eyes, you’ll know exactly why these became such a hit in our house.
What I love most is how simple they are – just crescent roll dough and hot dogs, but the kids feel like they’re creating little masterpieces. Plus, they’re ready in about 20 minutes, which is perfect for those last-minute Halloween party requests!
Table of contents
Easy Mummy Hot Dogs Recipe for Halloween Fun
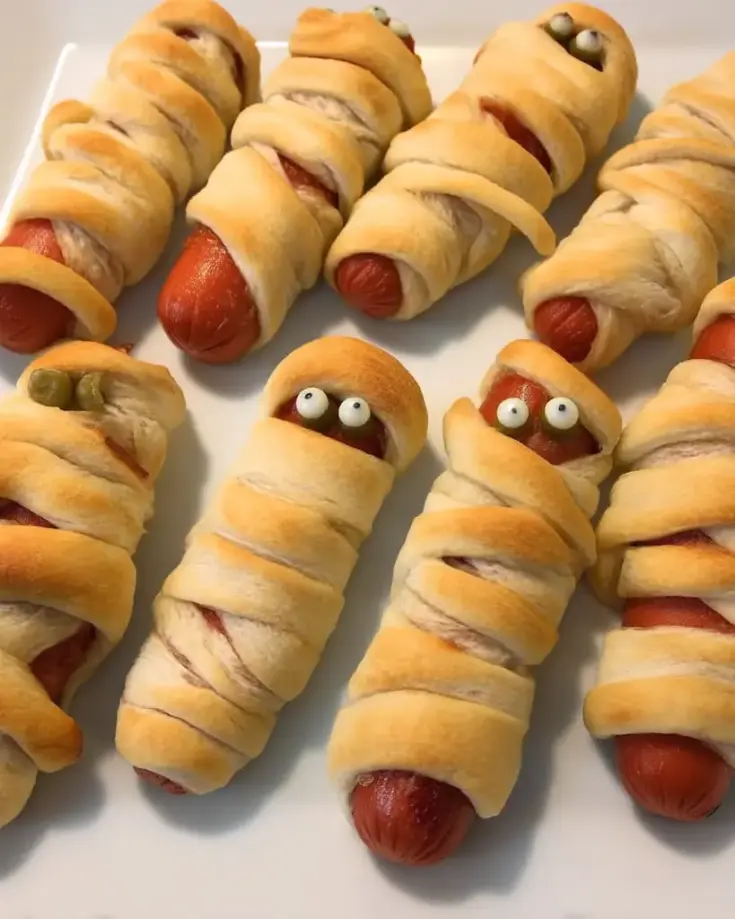
Adorable Halloween hot dogs wrapped in crescent roll "bandages" with mustard dot eyes that kids absolutely love making.
Ingredients
- 8 hot dogs
- 1 (8 ounce) package refrigerated crescent rolls
- 1 teaspoon yellow mustard (for eyes)
Instructions
- Preheat oven to 350°F.
- Boil hot dogs in water for 5 minutes until heated through, then drain.
- Unroll crescent dough and tear into 8 strips.
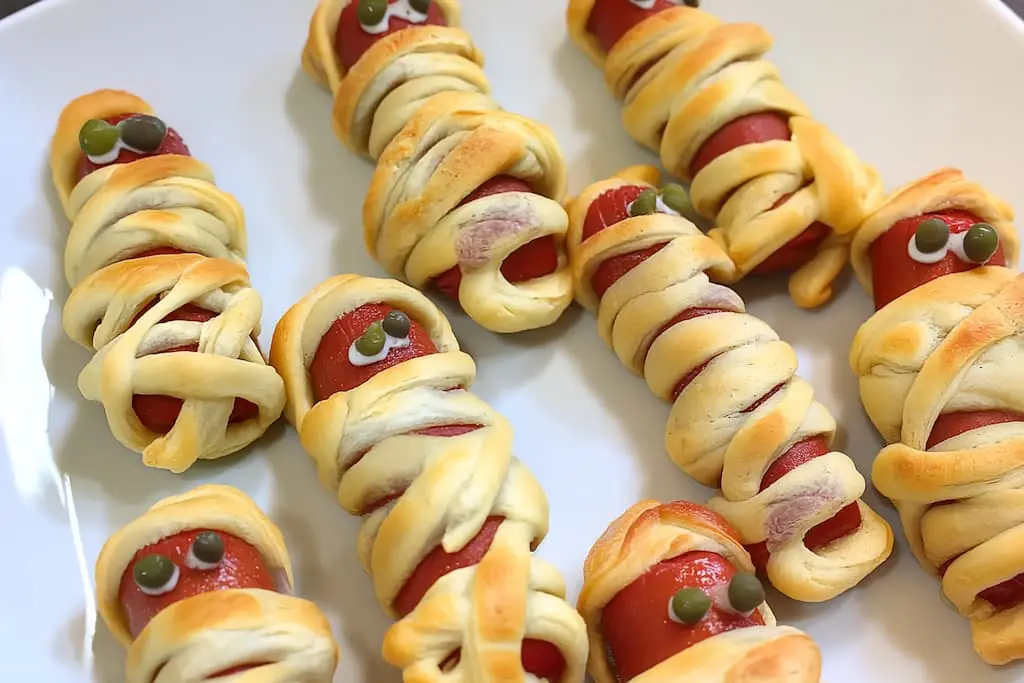
- Wrap each hot dog with dough strips, leaving gaps for mummy bandage look.
- Place on baking sheet and add mustard dots for eyes.
- Bake 10 minutes until dough is golden brown.
Notes
- Don't wrap too tightly - gaps make them look more like mummies
- Kids love adding their own mustard faces
- These disappear fast at parties, so consider doubling the recipe
- Use ketchup dots if you prefer red eyes
Nutrition Information:
Yield:
8Serving Size:
1Amount Per Serving: Calories: 168Total Fat: 15gSaturated Fat: 6gTrans Fat: 0gUnsaturated Fat: 7gCholesterol: 30mgSodium: 430mgCarbohydrates: 3gFiber: 0gSugar: 1gProtein: 6g
Nutrition info is an estimate based on typical ingredients and portions - I calculate these to give you a helpful starting point! For specific dietary needs or accurate counts, I recommend double-checking with your favorite nutrition app or talking to a health professional. You can read more about my approach to nutrition info at notetherecipe.com/disclaimer
What You’ll Need
You probably already have everything for these spooky little guys:
- 8 hot dogs (any brand works – I usually grab whatever’s on sale)
- 1 package refrigerated crescent rolls (8 oz)
- Yellow mustard for the eyes (ketchup works too if you want red eyes)
- Large baking sheet
- Medium saucepan for boiling
Detailed Cooking Instructions

Time needed: 20 minutes
Simple Halloween mummy hot dogs wrapped in crescent roll dough with mustard eyes.
- Prep and boil hot dogs
Preheat oven to 350°F. Boil hot dogs in water for about 5 minutes until heated through, then drain well.
- Prepare crescent dough
Unroll crescent roll dough and tear into 8 strips. Don’t worry about making them perfectly even – mummies aren’t supposed to look perfect!
- Wrap the mummies
Wrap each hot dog with dough strips, leaving gaps for that authentic mummy bandage look. Leave space at the top for the face.
- Add eyes and bake
Place on baking sheet and add small mustard dots for eyes. Bake 10 minutes until golden brown and flaky.
Tips & Tricks
- Don’t wrap the dough too tightly – those gaps are what make them look like real mummy bandages.
- Skip the boiling step if you’re short on time – just wrap raw hot dogs and bake for 12-15 minutes instead.
- Let the kids help with the wrapping and face-making – it’s messy fun and they love feeling involved.
- Make mini versions using cocktail sausages and cut the dough strips thinner for parties.
- Try different “eye” options – small pieces of cheese, olive slices, or even tiny pepperoni bits work great.
- These pair perfectly with my crispy baked zucchini chips for a fun Halloween dinner that sneaks in some veggies.
- The CDC’s food safety guidelines for parties recommend keeping hot foods at 140°F or above when serving at gatherings – I always use a warming tray for Halloween parties that last more than 2 hours.
You Might Also Like
If you’re planning a full Halloween spread, don’t miss my creamy dill pickle pasta salad – it’s always a hit with both kids and adults at parties. And for dessert, my strawberry pretzel salad adds a sweet finish that balances out all the savory party snacks.
Frequently Asked Questions
Crescent roll dough works perfectly and is super easy to handle. Puff pastry also works but can be trickier for kids to wrap.
You can wrap them and store in the fridge for up to 4 hours before baking. Add the mustard eyes right before baking so they don’t run.
According to the USDA Food Safety and Inspection Service, hot dogs should be heated to an internal temperature of 165°F to ensure food safety, especially important when serving to children at parties.
Use cocktail sausages instead and cut your dough strips thinner. Bake for 8-10 minutes since they’re smaller.
Yes! Air fry at 350°F for 6-8 minutes, checking halfway through. They cook a bit faster than in the oven.
Variations & Add-Ins
- Cheese-stuffed mummies: Cut a slit in each hot dog and stuff with cheese before wrapping
- Spicy version: Use jalapeño cheddar sausages instead of regular hot dogs
- Mini party bites: Make them with cocktail sausages for easier party serving
- Pizza dough mummies: Swap crescent rolls for pizza dough strips for a chewier texture
- Breakfast mummies: Use breakfast sausage links and serve with syrup for dipping
Dietary Notes
| Diet | Friendly? | Adjustments |
|---|---|---|
| Gluten-Free | No | Use gluten-free puff pastry or skip the wrapping |
| Dairy-Free | Yes | Check hot dog ingredients – most are dairy-free |
| Vegan | No | Use plant-based hot dogs and vegan pastry dough |
| Keto | No | Too high in carbs from the dough |
| Nut-Free | Yes | Always check hot dog and dough ingredient labels |
Storage, Freezing & Reheating
- Fridge: Store leftovers covered for 2-3 days, though the dough gets a bit soft.
- Freezer: Freeze unbaked wrapped hot dogs for up to 1 month – bake directly from frozen, adding 2-3 extra minutes.
- Thawing: If frozen raw, you can bake straight from the freezer without thawing.
- Reheat: Warm in a 300°F oven for 5 minutes or microwave for 30 seconds to crisp up the dough.
- Make-ahead tip: Wrap and refrigerate up to 4 hours before your party, then just pop in the oven when guests arrive.
- Party planning tip: I usually serve these alongside my crispy zucchini chips and dill pickle pasta salad for a complete Halloween spread that keeps well.
Save This Recipe for Halloween
These mummy hot dogs are definitely going to be a hit at your Halloween party! Save this recipe and share it with other parents who need a fun, easy treat that actually gets kids excited about helping in the kitchen.
Pin it here