I’ve been making chocolate crinkle cookies for years, but this Halloween, I decided to give them a spooky twist that my kids absolutely loved. These Spider Chocolate Crinkle Cookies are the same soft, fudgy cookies you know and love, but with a fun spider decoration that turns them into the perfect Halloween treat. My 8-year-old helped me add the candy eyes, and honestly, decorating these together became our favorite part of the whole baking session.
What I love most about this recipe is that the cookies themselves are incredibly forgiving. The dough chills overnight (which actually makes them better), and that powdered sugar coating creates those beautiful cracks every single time. Living in New Orleans, I’ve learned that humidity can mess with cookies, but these always turn out perfectly chewy on the inside with slightly crisp edges.
What I love most about chocolate crinkle cookies is that they’re made with simple pantry staples – unsweetened cocoa powder gives them that rich chocolate flavor without added sugar until the coating. According to the USDA FoodData Central, unsweetened cocoa powder is actually packed with nutrients, which makes me feel a little less guilty when my kids ask for seconds! If you love easy desserts that look impressive, you’ll want to check out my peach cobbler dump cake too – it’s another one of those recipes that seems fancy but comes together in minutes!
Key Takeaways
- These Spider Chocolate Crinkle Cookies add a fun Halloween twist to classic chocolate crinkle cookies, featuring spider decorations that kids love.
- Chilling the dough for at least 4 hours is essential; it creates beautiful cracks and improves texture.
- The recipe uses pantry staples like unsweetened cocoa powder for a rich flavor without excess sugar until coating.
- You can easily adapt the recipe with variations like peppermint chocolate crinkles or gluten-free options.
- Store cookies at room temperature for up to 5 days, and follow tips for freezing and reheating to maintain freshness.
Estimated reading time: 1 minute
Table of contents

Spider Chocolate Crinkle Cookies
Soft, fudgy chocolate crinkle cookies decorated as spiders - perfect for Halloween parties or any time you want a fun chocolate treat. These cookies have that classic crackled powdered sugar coating and are easy enough for kids to help decorate.
Ingredients
- 1 cup unsweetened cocoa powder
- 2 cups granulated sugar
- 1/2 cup vegetable oil
- 4 large eggs
- 2 teaspoons vanilla extract
- 2 cups all-purpose flour
- 2 teaspoons baking powder
- 1 teaspoon salt
- 1 cup powdered sugar (for coating)
- 48 candy eyes (for decoration)
- 12 pretzel sticks, broken into pieces (for spider legs)
Instructions
- In a medium bowl, mix together cocoa powder, granulated sugar, and vegetable oil until well combined and glossy.
- Beat in eggs one at a time, then add vanilla extract, mixing until smooth and shiny.
- In a separate bowl, whisk together flour, baking powder, and salt.
- Stir the flour mixture into the cocoa mixture just until combined (don't overmix).
- Cover dough with plastic wrap and refrigerate for at least 4 hours or overnight.
- Preheat oven to 350°F and line baking sheets with parchment paper.
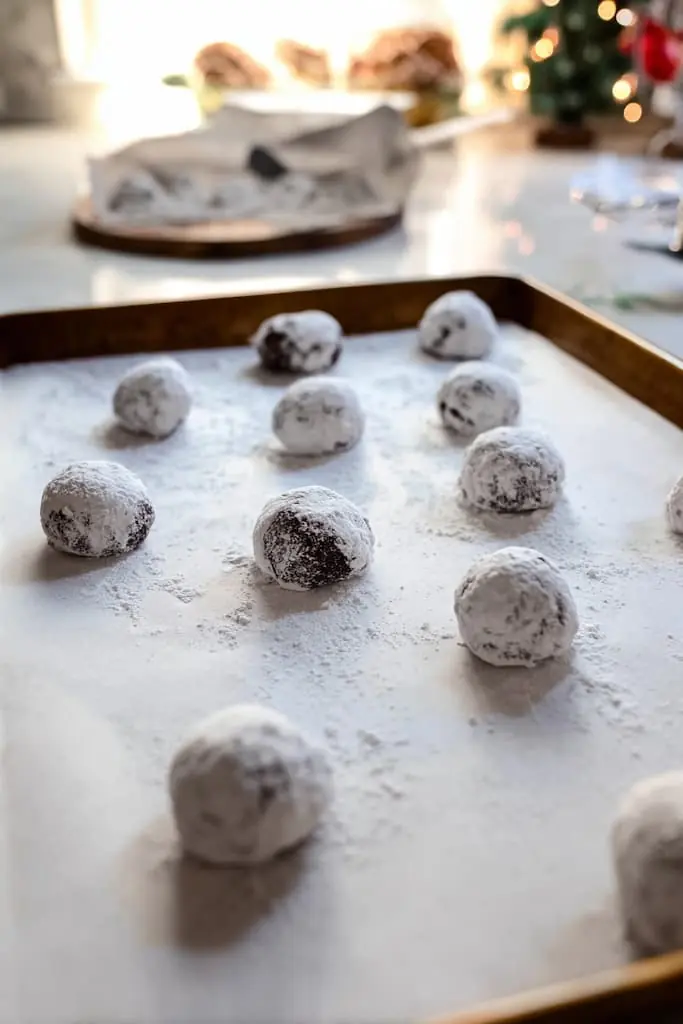
- Roll chilled dough into 2-inch balls and coat completely in powdered sugar.
- Place dough balls on prepared baking sheets, spacing them about 2 inches apart.
- Bake for 12-14 minutes until cookies are set but still soft in the center.
- Immediately after removing from oven, press two candy eyes and 8 pretzel stick pieces into each cookie to create spiders.
- Let cool on baking sheet for 5 minutes, then transfer to a wire rack to cool completely.
Notes
- The dough must be chilled - warm dough won't create those signature cracks
- Use a cookie scoop for evenly sized cookies that bake consistently
- Add spider decorations while cookies are still hot so they stick properly
- Store in an airtight container for up to 5 days
- For year-round treats, skip the spider decorations and enjoy plain
Nutrition Information:
Yield:
24Serving Size:
1Amount Per Serving: Calories: 165Total Fat: 6gSaturated Fat: 1gTrans Fat: 0gUnsaturated Fat: 4gCholesterol: 31mgSodium: 135mgCarbohydrates: 28gFiber: 1gSugar: 19gProtein: 4g
Nutrition info is an estimate based on typical ingredients and portions - I calculate these to give you a helpful starting point! For specific dietary needs or accurate counts, I recommend double-checking with your favorite nutrition app or talking to a health professional. You can read more about my approach to nutrition info at notetherecipe.com/disclaimer
What You’ll Need
Here’s everything you need to make these spooky treats. The base recipe is the same chocolate crinkle cookies I’ve been making for years – we’re just adding fun decorations!
- 1 cup unsweetened cocoa powder (I use Hershey’s, it’s reliable and rich)
- 2 cups granulated sugar
- 1/2 cup vegetable oil (or melted coconut oil works too)
- 4 large eggs (room temperature works best)
- 2 teaspoons vanilla extract
- 2 cups all-purpose flour
- 2 teaspoons baking powder
- 1 teaspoon salt
- 1 cup powdered sugar (for coating the dough balls)
- 48 candy eyes (find these in the baking aisle near Halloween)
- 12 pretzel sticks (broken into small pieces for spider legs)
- Stand mixer or hand mixer (makes mixing easier, but a wooden spoon works)
- Cookie sheets lined with parchment paper
- Wire cooling rack
Detailed Cooking Instructions
Time needed: 4 hours and 32 minutes
Make soft, fudgy chocolate crinkle cookies decorated as spiders for Halloween. Includes chilling time for perfect texture.
- Mix the chocolate base
In a medium bowl, combine cocoa powder, granulated sugar, and vegetable oil. Mix with a stand mixer or wooden spoon until it looks dark and glossy. This creates the rich chocolate foundation that makes these cookies so fudgy.
- Add eggs and vanilla
Beat in the eggs one at a time, making sure each one is fully mixed in before adding the next. Then stir in the vanilla extract. Your mixture should look smooth and shiny now – that’s exactly what you want!
- Combine dry ingredients
In a separate bowl, whisk together the flour, baking powder, and salt. Make sure there are no lumps in the baking powder – I always break them up with my fingers before whisking.
- Mix wet and dry together
Add the flour mixture to the chocolate mixture and stir just until everything is combined. Don’t overmix here – stop as soon as you don’t see any more flour streaks. The dough will be thick and sticky.
- Chill the dough
Cover the bowl tightly with plastic wrap and refrigerate for at least 4 hours, or overnight if you’re planning ahead. This chilling time is what creates those beautiful cracks – don’t skip it! I usually make the dough after dinner and bake the next day.
- Prepare for baking
Preheat your oven to 350°F. Line your cookie sheets with parchment paper – trust me, this makes cleanup so much easier. Put your powdered sugar in a medium bowl for coating.
- Shape and coat cookies
Scoop the chilled dough into 2-inch balls – a cookie scoop makes this super easy and keeps them uniform. Drop each ball into the powdered sugar and roll it around until it’s completely coated and looks like a little snowball. Don’t be shy with the sugar!
- Bake the cookies
Place the sugar-coated dough balls on your prepared baking sheet, leaving about 2 inches between each one. You should fit about 12 cookies per sheet. Bake for 12-14 minutes – they should look set on the edges but still soft in the middle when you take them out.
- Add spider decorations
Here’s the fun part! As soon as the cookies come out of the oven, press two candy eyes into each cookie for the spider face. Then gently insert 8 small pieces of pretzel stick around the edges to create spider legs. Work quickly while the cookies are still hot so everything sticks properly.
- Cool and serve
Let the cookies cool on the baking sheet for about 5 minutes – this helps them set up and makes them easier to move. Then transfer them to a wire rack to cool completely. They’re amazing warm, but I actually think they taste even better the next day!
Tips & Tricks
- The chilling time is non-negotiable – I learned this the hard way when I tried to rush it once. Warm dough spreads too much and won’t crack properly. Plan ahead and make the dough the night before.
- Use a cookie scoop to keep your cookies the same size. They’ll bake evenly and look more professional. I use a 2-tablespoon scoop for these.
- Roll the dough balls in powdered sugar twice for extra coating. First coat them lightly, then give them another generous roll right before placing on the baking sheet.
- Add the spider decorations immediately when the cookies come out of the oven. If you wait until they cool, the candy eyes and pretzels won’t stick. I learned to have everything ready and waiting next to the oven.
- Don’t overbake these – they should still look slightly underdone in the center when you take them out. They’ll continue cooking on the hot pan and will be perfectly chewy once cooled.
You Might Also Like
Looking for more spooky treats? My easy ghost cake is another Halloween favorite that my kids request every year – it’s simple enough for beginners but looks absolutely adorable!
Frequently Asked Questions
The secret is chilling the dough for at least 4 hours before baking. Cold dough spreads slowly in the oven, which creates those beautiful cracks as the cookie expands. Also, coating the dough balls generously in powdered sugar before baking gives you that classic white crackle effect against the dark chocolate.
Yes! Crinkle cookies should be slightly gooey in the center when you take them out of the oven. They’ll look underdone but will set up as they cool. That’s what makes them so fudgy and chewy. If you bake them until they’re completely set, they’ll end up dry and cake-like instead of that perfect soft texture.
Absolutely! The dough must be chilled for at least 4 hours or overnight. This firms up the dough so you can roll it into balls, and more importantly, it prevents the cookies from spreading too quickly in the oven. Without chilling, you won’t get those signature cracks. I always make the dough the night before and bake fresh the next day.
You can make lemon crinkle cookies by replacing the cocoa powder with lemon zest and juice, or try peppermint chocolate crinkles by adding crushed candy canes. For a year-round treat, skip the spider decorations and enjoy them plain, or roll them in colored sugar for different holidays. I’ve also made them with espresso powder added to the chocolate for a deeper flavor that adults love.
Variations & Add-Ins

- Peppermint Chocolate Crinkles: Add 1/2 teaspoon peppermint extract to the dough and press a mini candy cane piece on top instead of spider decorations for a festive Christmas cookie.
- Espresso Chocolate Crinkles: Mix 2 tablespoons instant espresso powder into the cocoa for a deeper, more grown-up chocolate flavor. Perfect for coffee lovers!
- Orange Chocolate Crinkles: Add 1 tablespoon orange zest to the dough for a subtle citrus twist that brightens the chocolate flavor beautifully.
- Gluten-Free Version: Swap the all-purpose flour for a 1-to-1 gluten-free baking flour. I’ve tested this with Bob’s Red Mill and it works great – just make sure to chill the dough a bit longer.
- Monster Spider Cookies: Make larger 3-inch dough balls and add mini chocolate chips to the dough for extra chocolate chunks. Kids love these bigger, more dramatic spiders!
- Lemon Crinkle Cookies: Want a completely different flavor? Try my lemon lavender cake technique but adapted for cookies – replace the cocoa with lemon zest and use white chocolate chips for a bright, citrusy treat.
Dietary Notes
| Diet | Friendly? | Adjustments |
|---|---|---|
| Gluten-Free | With Modifications | Use 1-to-1 gluten-free flour blend; chill dough an extra hour |
| Dairy-Free | Yes | Already dairy-free as written – no butter or milk used |
| Vegan | With Modifications | Replace eggs with flax eggs (4 tablespoons ground flax + 12 tablespoons water); results will be slightly less fudgy |
| Keto | No | Too high in sugar and carbs; would require complete recipe redesign |
| Nut-Free | Yes | No nuts in recipe; check candy eye labels for nut warnings |
Storage, Freezing & Reheating
- Fridge: Store baked cookies in an airtight container at room temperature for up to 5 days. They actually taste better after a day when the flavors meld together.
- Room Temperature Storage: These cookies can safely stay at room temperature for up to 5 days when stored properly in an airtight container. The FDA recommends keeping baked goods that don’t contain cream cheese, whipped cream, or custard fillings at room temperature – and since these are just chocolate cookies, they’re perfectly safe on your counter!
- Freezer: Freeze baked cookies for up to 3 months in a freezer-safe container with parchment paper between layers. You can also freeze the unbaked dough balls (already coated in powdered sugar) for up to 2 months – just bake straight from frozen, adding 2 extra minutes.
- Thawing: Let frozen cookies thaw at room temperature for about 30 minutes, or enjoy them slightly chilled for a different texture that my kids actually prefer!
- Reheat: Warm cookies in a 300°F oven for 5 minutes to get that fresh-baked softness back. I don’t recommend microwaving as it makes them tough.
- Make-Ahead Tip: The dough keeps beautifully in the fridge for up to 3 days, so you can make it ahead and bake fresh cookies whenever you need them. This is perfect for Halloween parties – prep the dough earlier in the week and bake fresh the day of.
Save This Recipe for Later
These Spider Chocolate Crinkle Cookies are always a hit at Halloween parties, and honestly, my kids ask for them year-round without the spider decorations. Save this recipe to your Pinterest board so you can find it whenever you need an impressive but easy chocolate cookie!
Pin it here