Table of Contents
In today’s post, I’m thrilled to share my family’s go-to valentine’s day chocolate bark recipe. It’s incredibly easy, super fun, and it looks like you’ve put in far more effort than you actually have. Best of all, kids love getting involved. They can sprinkle on decorations and swirl the chocolate, making your kitchen a magical place filled with giggles and sugar. This valentines chocolate bark recipe has truly become a tradition in our home, and I hope it brings as much joy to your family as it has to mine.
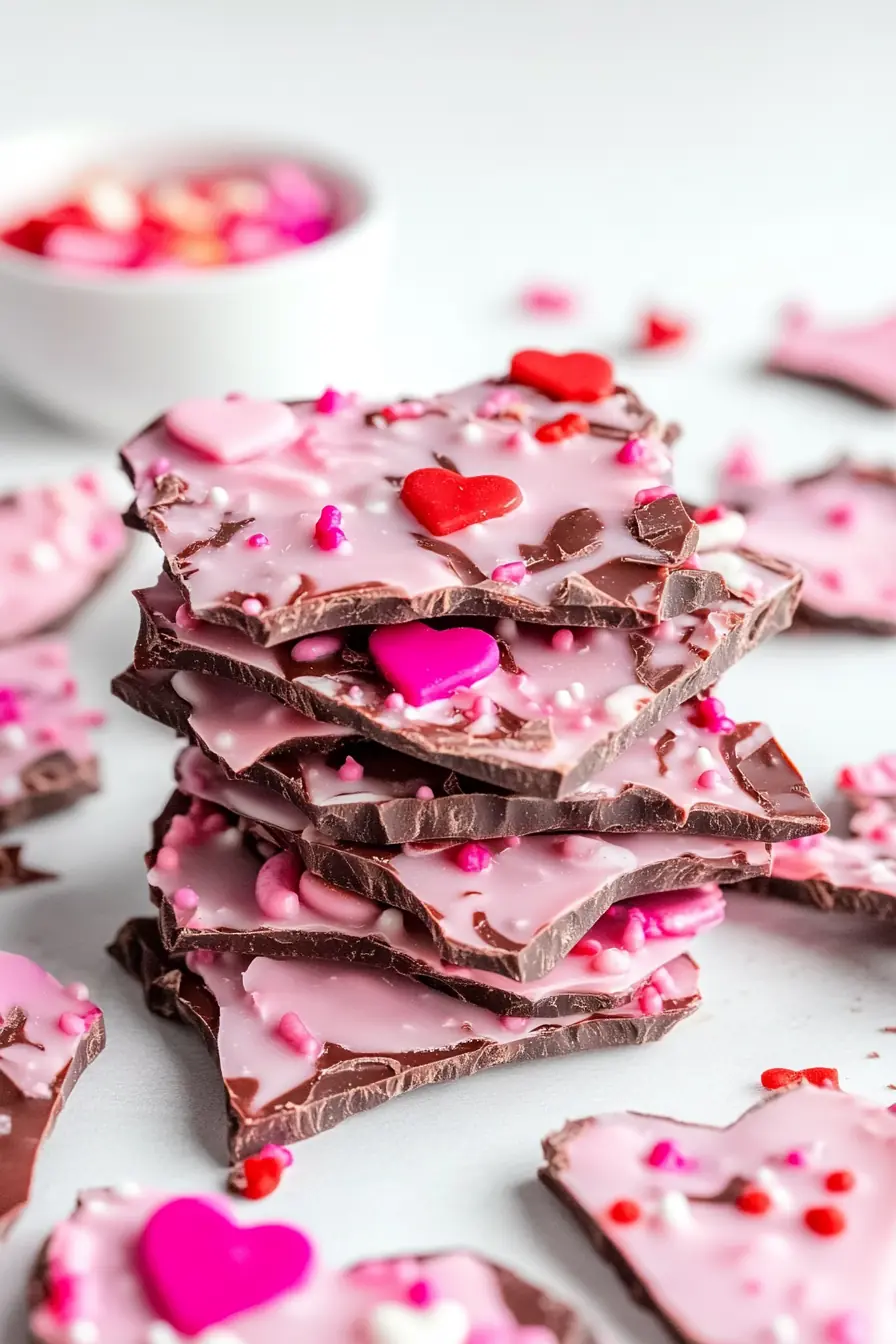
Let’s face it: Valentine’s Day is all about showing love, gratitude, and sometimes spoiling ourselves just a tad. What better way to share love than with homemade chocolate? Melted chocolate is like a universal language, bridging the gap between cultures. Add in some pink candy melts, swirl it all together, top with sprinkles, and you’ve got a sweet gesture for anyone who could use a pick-me-up. For me, that could be neighbors, teachers, friends—whoever deserves a moment of chocolate bliss.
So grab your favorite mixing bowl, line a baking sheet, and let’s create some valentine chocolate bark together. Below, you’ll find everything you need to ensure your sweet treat sets perfectly, tastes divine, and wows your loved ones.
Why I Love Making Valentine’s Chocolate Bark
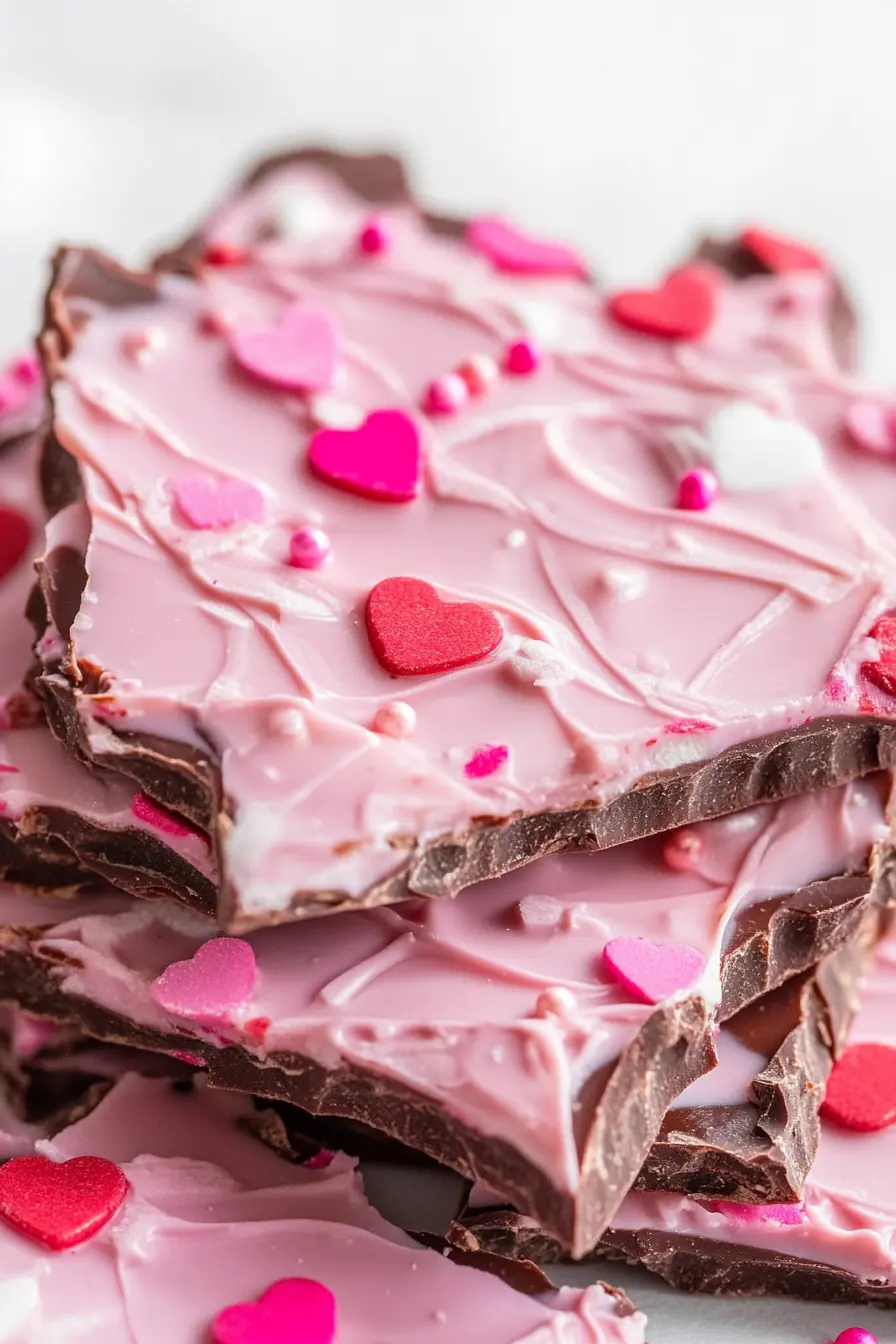
This chocolate bark valentine’s recipe is an activity that you can tackle on a random weeknight if you realize you need a last-minute Valentine’s gift for someone.
I love how easy it is to personalize each batch. One year, I tried swirling in some leftover crushed peppermints from Christmas, which made for a minty, pink-flecked bark. Another time, I used colored candy melts in different hues of pink, so it looked like a watercolor painting. The best part? No matter how you swirl or sprinkle, it’ll taste delicious.
Ingredients You’ll Need
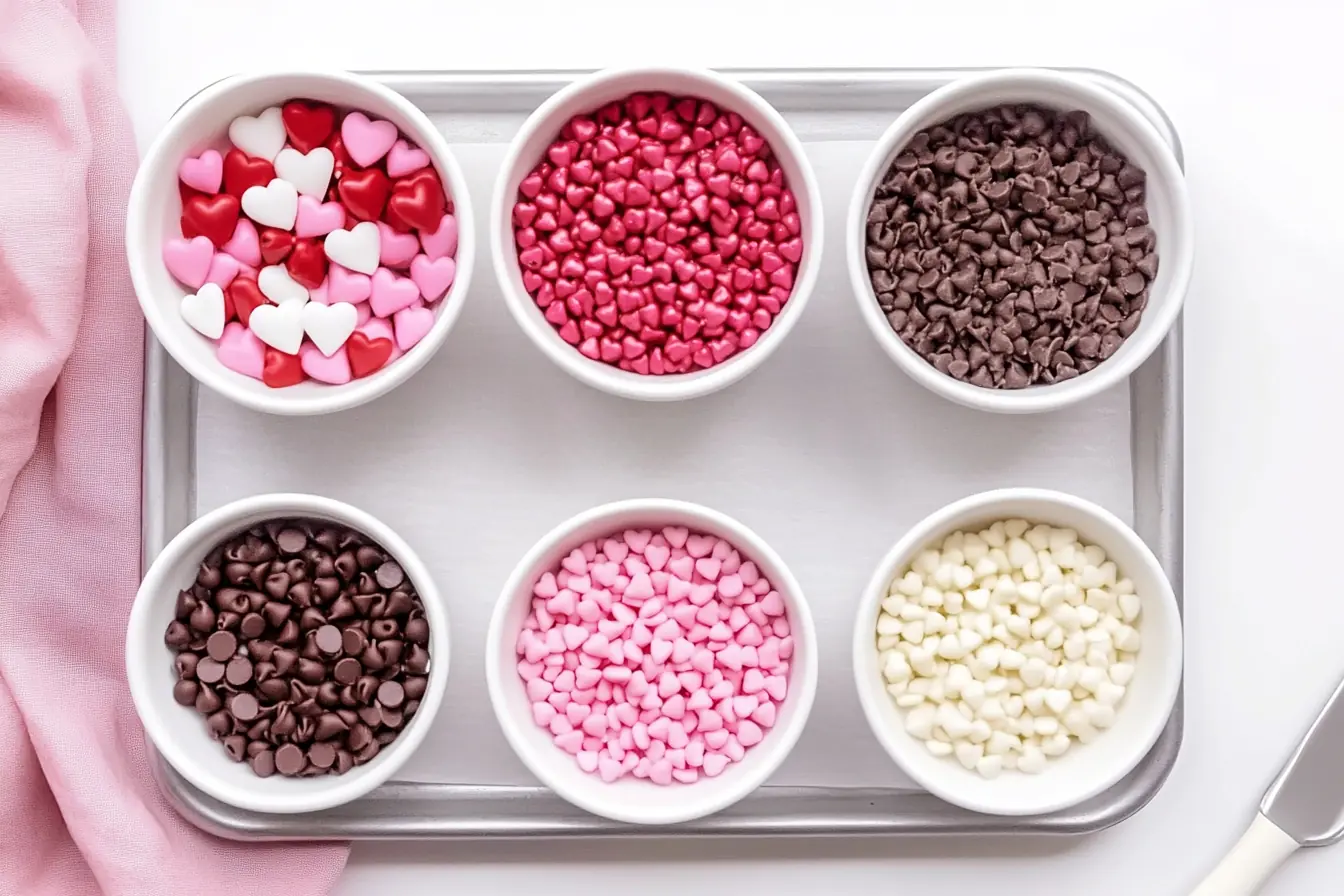
Before we dive into the valentines chocolate bark recipe, let’s gather the essentials. I’ve adapted this recipe over time for accessibility. You should be able to find these ingredients in most grocery stores:
- 1 cup semi-sweet chocolate chips
(Feel free to use milk chocolate chips if you prefer a sweeter bite.) - 3/4 cup white chocolate chips
(Great for a creamy contrast. You can also use almond bark if that’s more convenient.) - 1/2 cup pink candy melts
(These are found in the baking or crafting aisle. If you can’t find them, use more white chocolate plus a drop of red gel food coloring.) - Valentine’s sprinkles
(Hearts, glitter, pearls—whatever screams “Valentine’s Day” to you.)
Optional Add-Ons:
- Crushed cookies (like chocolate sandwich cookies)
- Dried cranberries for a tart pop of color
- Chopped nuts for texture
- Mini marshmallows for sweetness
Step-by-Step for Valentine’s Day Chocolate Bark
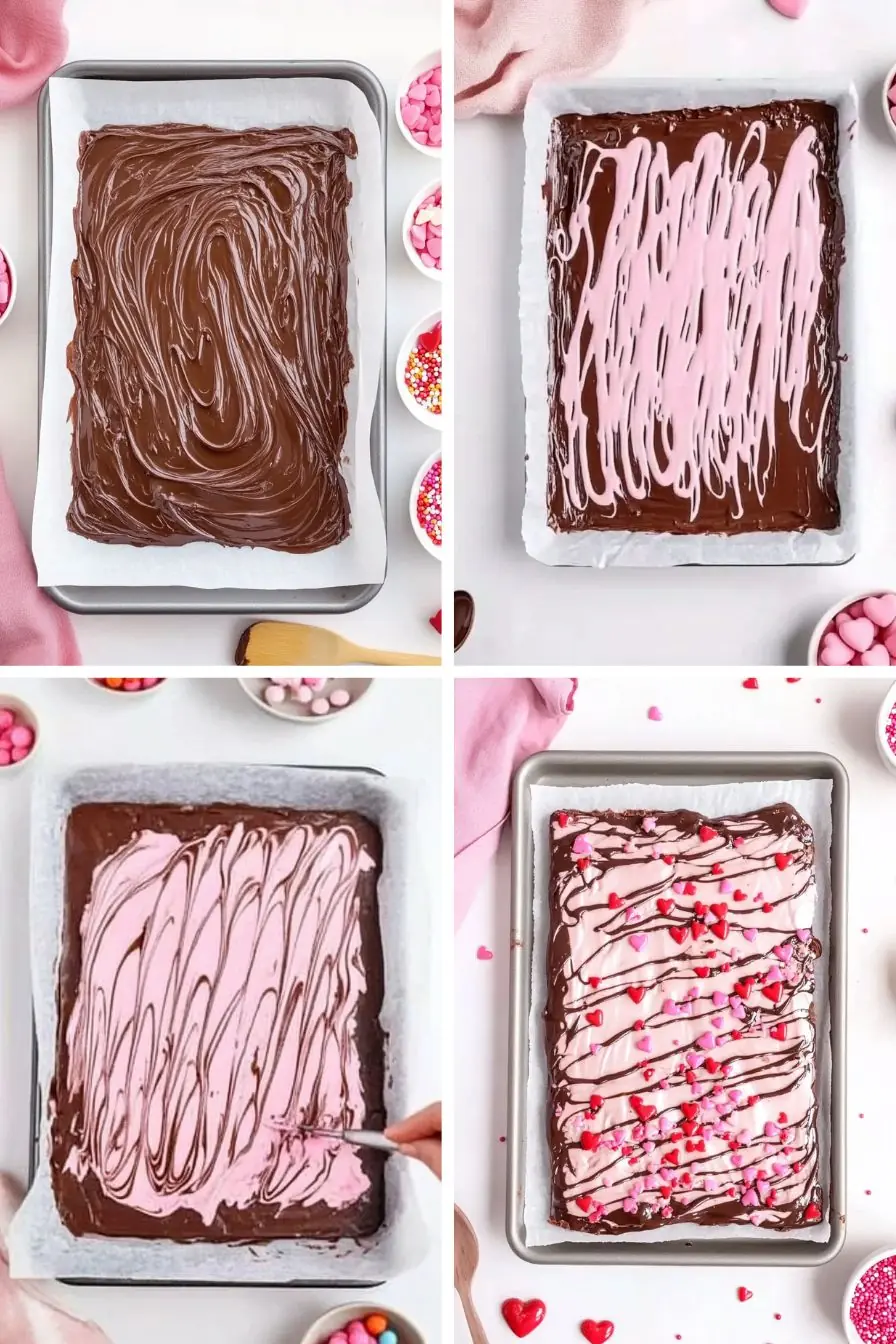
This valentine’s day chocolate bark method is pretty straightforward. Just be mindful of melting times, and you’ll be fine.
- Line Your Baking Sheet
Start by lining a baking sheet (about 9×13 inches) with parchment paper. The parchment will help you lift the bark out of the tray once it sets. - Melt the Semi-Sweet Chocolate
Place the semi-sweet chocolate chips in a microwave-safe bowl. Melt them in 20-second bursts, stirring each time. I like to hover by the microwave to ensure I don’t overheat the chocolate. It can go from smooth to scorched in the blink of an eye. If you prefer, you can use a double boiler on the stovetop—just remember to keep the heat gentle and stir often. - Spread It Out
Once melted, pour the chocolate onto the parchment-lined sheet. Use a spatula to spread it into an even layer. Aim for a thickness of about a quarter-inch or so. My personal preference is a somewhat thin layer, making it easy to break apart later. - Melt the White Chocolate Chips & Pink Candy Melts
Next, melt your white chocolate chips and pink candy melts in the same way, using 20-second bursts in the microwave and stirring diligently. Once both are smooth, combine them in a bowl, stirring gently to blend. If you’re using white chocolate with added red coloring, mix it in quickly to avoid any clumps. - Pour & Swirl
Drizzle this melted pinkish-white mixture over your semi-sweet chocolate layer. To create a pretty marble effect, take a butter knife and gently swirl the layers together. You can make big loops or small curls—go with whatever feels fun. This swirling step is often where my kids jump in. They love creating patterns and shapes. - Sprinkle Away
Now’s the time to sprinkle those festive Valentine’s toppings. Move fairly quickly before the chocolate starts to set. You can add as many or as few sprinkles as you like. My children prefer to drown the bark in decorations, which usually gives it a colorful, confetti-like appearance. - Chill & Break
Slide the baking sheet into the fridge. Let the bark rest for about 45 minutes or until it’s completely firm. If you’re in a rush, you can pop it into the freezer for a shorter time, but don’t forget it there! Once it’s set, lift the parchment, place the bark on a cutting board, and break it into pieces. I typically go for rustic shards, but if you prefer a cleaner look, you can use a knife.
And that’s it. Your homemade valentines chocolate bark is ready to dazzle taste buds. The swirling, the layering, and the decorations all add to the fun. Plus, each piece looks a little different, which is part of the charm.
Personal Tips and Anecdotes
- Mind the Heat: It’s easy to over-microwave your chocolate. In my experience, especially in winter, we crave hot drinks and warm food. But chocolate is delicate. If it gets too hot, it seizes. Make sure you’re heating in short bursts and stirring often.
- Work in Batches: Sometimes I melt half of the chocolate, spread it, then melt the rest. This prevents any rushing. If you have little helpers around, it’s also easier to manage the chaos.
- Have Fun with Colors: Feel free to mix and match your color palette based on preference or whatever candy melts you can find.
- Embrace Imperfection: My first few attempts at swirling multiple colors ended up looking more like a tie-dye gone wrong. But guess what? The taste didn’t change one bit. Plus, people kept telling me it looked “artsy.” Embrace the uniqueness of each batch.
- Get the Family Involved: Let your children or friends swirl and sprinkle. Sure, your kitchen might look like a sprinkle tornado swept through, but it’s worth it for the memories.
Flavor Variations and Add-Ons
One of the best parts of making white chocolate valentines bark is how versatile it can be. Don’t hesitate to experiment. Here are some of my favorite flavor twists:
- Sweet & Salty: Add a handful of crushed pretzels on top right after swirling. It adds the perfect salty contrast to the sweet chocolate.
- Nutty Goodness: Try chopped hazelnuts or almonds. My aunt in Oslo always added hazelnuts to her bark, and it gave the treat a delicious crunch.
- Fruity Burst: Dried strawberries or raspberries lend bright color and tangy flavor. Scatter them on top for a lovely pink hue that pairs well with chocolate.
- Peppermint Kisses: Crushed candy canes aren’t just for Christmas. If you love mint, swirl in a tiny bit of peppermint extract and top with crushed candy canes. It’s a wintery vibe that still fits the Valentine’s aesthetic (especially if your canes have red stripes).
- Caramel Drizzle: Melt some soft caramels and drizzle them on top. Add a sprinkle of coarse sea salt for a gourmet finish.
These variations are perfect for those who like to put their personal stamp on a recipe. If you’re like me, you might find a new favorite combo each year. Sometimes it’s sweet and spicy, other times it’s fruity and tangy. The possibilities are endless, which keeps it exciting.
Storage and Shelf Life
Once your valentine’s chocolate bark has fully hardened and you’ve broken it into pieces, you’ll want to keep it fresh. Here’s what I do:
- Room Temperature: Store it in an airtight container on the counter for up to a week. Keep it away from direct sunlight or heaters, which can cause melting or that white, chalky look known as “chocolate bloom.”
- Refrigerator: If your home is especially warm, or if you just prefer chilled chocolate, place the bark in a sealed container in the fridge for up to two weeks.
- Freezer: You can freeze leftover bark for about two months. Just be sure to let it thaw in the fridge or at room temperature before you dig in. Sudden temperature changes can affect the texture.
Wherever you store it, the key is to keep your bark dry and well-sealed. Humidity can cause issues with chocolate, making it lose its snap. Then again, most of the time, it disappears so fast in my house that long-term storage isn’t even necessary.
Making It a Sweet Valentine’s Gift
Maybe I’m old-fashioned, but I adore homemade gifts. Something about unwrapping a present that someone crafted by hand just warms my heart. If you want to turn your valentines chocolate into a thoughtful gift:
- Cellophane Bags & Ribbons: Gather a few bark pieces into a clear cellophane bag. Tie it with a pink or red ribbon. It’s simple, affordable, and looks adorable.
- Decorated Mason Jars: Place bark shards in a small mason jar and add a handwritten tag. My kids love adding stickers or doodles to the jars.
- Small Boxes with Tissue Paper: For a fancier option, get a little cardboard box (often found in craft stores). Line it with tissue paper, place the bark inside, and secure with a small sticker.
However you choose to gift it, let the recipient know you made it yourself. People love hearing that extra personal touch, especially on Valentine’s Day.

Valentine’s Chocolate Bark Recipe
- Prep Time: 10 minutes
- Cook Time: 5 minutes
- Total Time: 15 minutes
- Yield: 6 to 8 servings
- Category: Bakes
- Method: No-bake
- Cuisine: American
- Diet: Gluten Free
Description
This easy Valentine’s Chocolate Bark recipe is perfect for a festive and delicious treat! Swirls of dark, white, and pink chocolate topped with sprinkles make it a fun activity for kids and a delightful homemade gift for loved ones.
Ingredients
- 1 cup semi-sweet chocolate chips
- 3/4 cup white chocolate chips
- 1/2 cup pink candy melts
- Valentine’s sprinkles
(Optional add-ins: Chopped nuts, dried fruit, mini marshmallows, crushed cookies, or caramel drizzle.)
Instructions
- Prepare the baking sheet: Line a baking sheet with parchment paper.
- Melt the semi-sweet chocolate: In a microwave-safe bowl, melt the chocolate chips in 20-second bursts, stirring between each until smooth.
- Spread the chocolate: Pour the melted chocolate onto the baking sheet and spread it evenly.
- Melt white chocolate and pink candy melts: Use the same method as above. Once melted, mix them together.
- Pour and swirl: Drizzle the white and pink chocolate mixture over the semi-sweet chocolate and use a knife to swirl them together.
- Decorate: Sprinkle Valentine’s sprinkles evenly over the top.
- Chill: Refrigerate for about 45 minutes until fully set.
- Break into pieces: Once hardened, break into chunks and enjoy!
Notes
- Store in an airtight container at room temperature for up to a week.
- Refrigerate for up to two weeks or freeze for up to two months for longer storage.
- Swap candy melts for white chocolate with a few drops of red or pink food coloring.
Nutrition
- Serving Size: 1 piece (~40g)
- Calories: 220
- Sugar: 18g
- Sodium: 15mg
- Fat: 12g
- Saturated Fat: 7g
- Unsaturated Fat: 3g
- Trans Fat: 0g
- Carbohydrates: 25g
- Fiber: 1g
- Protein: 2g
- Cholesterol: 0mg
Keywords: valentine’s chocolate bark, valentine’s day chocolate bark, valentines chocolate bark recipe, valentines chocolate bark, white chocolate valentines bark, valentine’s day chocolate bark recipe, valentine chocolate bark
Frequently Asked Questions (FAQs)
Below are the top questions I hear whenever I share this chocolate bark valentine’s recipe with family, friends, and neighbors. I hope these answers help you troubleshoot any hiccups and inspire you to get creative.
Absolutely! If you love a sweeter bite, milk chocolate is perfect for your valentines chocolate bark recipe. I’ve even mixed milk chocolate and dark chocolate together for a layered effect. Just note that milk chocolate tends to melt a bit faster, so stir it carefully.
If you don’t have pink candy melts, don’t worry. You can create white chocolate valentines bark simply by melting extra white chocolate chips. Then add a drop or two of red gel food coloring. Stir briskly to blend the color smoothly. The result is just as pretty, and you can control the shade of pink!
Any sprinkle that you adore is fair game. I love heart-shaped quins and shimmery pearls for a romantic look. Kids often prefer bright confetti sprinkles or fun shapes like unicorns. The key is to add them while the chocolate is still tacky so they adhere well.
Swirling is all about controlled chaos. If you prefer more defined layers, spread your first layer of chocolate and let it set slightly before drizzling the second layer. Then swirl gently. If you want a more marbled, blended effect, swirl immediately without letting the first layer harden.
Yes, but proceed with caution. A little goes a long way. Peppermint extract is a popular choice. Orange extract can be lovely too. If using essential oils, make sure they’re food-grade and safe for consumption. Start with a small drop and taste-test before adding more.
Valentine’s day chocolate bark typically stays fresh for about a week at room temperature if stored in an airtight container. If you live somewhere warm or your kitchen is toasty, refrigerate it. Alternatively, freeze it for up to two months. Just let it thaw gently to avoid condensation on the chocolate.
A Few More Helpful Pointers
- Swirl Techniques: Use a toothpick or a skewer to drag lines through the layers. You can draw heart shapes by making small loops. If it doesn’t look perfect, that’s okay—abstract art is beautiful too.
- Extra Crunch: Sprinkle chopped nuts, toffee bits, or crispy cereal on top. Kids tend to love the crunchy factor, especially if they’re used to cereal toppings in their treats.
- Quick Cleanup: Cover your counters with parchment or newspaper if you have mini chefs assisting you. Trust me, it saves a ton of effort later.
- Mind the Smells: If your fridge has strong-smelling foods like onions or garlic, seal the bark tightly so it doesn’t absorb any odors. Chocolate can be surprisingly porous.
- Leftover Melted Chocolate: If you have leftover melted chocolate, go ahead and dip some strawberries, pretzels, or even shortbread cookies. No waste, more treats!
Serving Suggestions
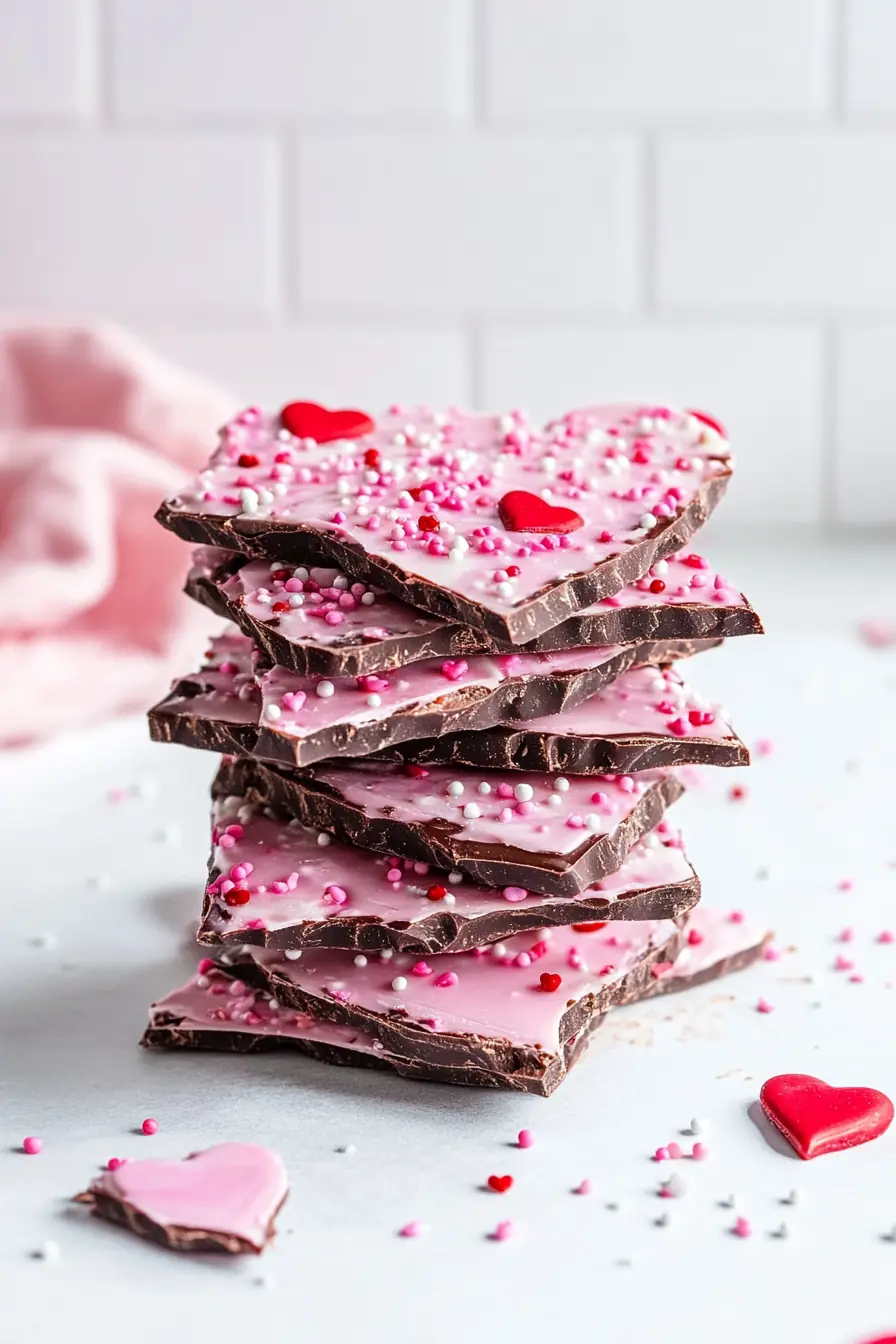
This delightful bark can be the star of your dessert table or just a sweet treat after dinner. Here are some fun ways to serve it:
- Hot Cocoa Companion: Place a bowl of bark pieces next to a mug of hot cocoa. Stir a piece into the hot drink for an extra-chocolatey sip.
- Party Favor: Wrap individual shards in little treat bags if you’re hosting a Valentine’s party or a Galentine’s gathering.
- Lunchbox Surprise: Tuck a piece into your kids’ lunchbox. It’ll be a sweet pick-me-up in the middle of a school day.
- Movie Night Munchies: Set out a platter of bark while you watch a family-friendly film. My kids love snapping off bits during the movie, and it’s far less messy than some other treats.
You Might Also Like
- Patriotic Chocolate Chip Cookies Everyone Loves
A festive red, white, and blue cookie recipe perfect for holidays and parties. - Cupid Crunch Valentine’s Day Trail Mix – Sweet & Easy Snack
A fun Valentine’s snack mix that’s great for kids, parties, or gifting. - Blissful Keto Chocolate Covered Berry Skewers
A low-carb sweet treat made with fresh berries and rich dark chocolate. - Easy 4th of July Snack Mix
Quick, colorful, and perfect for patriotic celebrations or movie nights. - Strawberry Cheesecake Brownies – Easy & Delicious Recipe
A rich, fruity dessert that blends creamy cheesecake with fudgy brownies.
Turning Mistakes into Masterpieces
If anything goes wrong, don’t panic. Melted chocolate can be finicky. I’ve had plenty of mishaps myself:
- If Your Chocolate Seizes: Sometimes, if even a drop of water sneaks into the chocolate, it can clump up. Don’t throw it away yet! You can save it by adding a little vegetable oil or coconut oil and stirring vigorously. The texture might not be perfect for swirling, but it’ll still be edible and yummy.
- If Your Colors Don’t Blend Well: Suppose your pink swirl isn’t melding with the white chocolate. That’s okay! It might look marbled or color-blocked. Embrace the “mod” design.
- If Sprinkles Don’t Stick: If you wait too long, the top layer might harden. To fix this, drizzle another thin layer of melted chocolate on top, then sprinkle away.
- Overheating Issues: If you’ve accidentally overheated your chocolate and it’s beyond saving, consider starting fresh. Use the overcooked batch in something else, like brownies, where it won’t affect the texture as much.
Every small mistake can lead to an inventive tweak. Some of my favorite bark versions came from spur-of-the-moment fixes. It’s part of the journey!
Final Thoughts and a Warm Invitation
Valentine’s Day is about love—love for each other, love for family, and love for life’s simple pleasures. To me, valentine’s chocolate bark symbolizes all of that in a sweet, crunchy package. It’s an edible gesture of affection that can easily be shared around.
I’d love to see how your bark turns out. Whether you go classic with just chocolate and sprinkles, or you attempt something wild like chili flakes in your swirl, please take a photo and share it on Pinterest. Tag me so I can join in the celebration. I’m incredibly grateful for this little cooking community we’ve built together, and nothing makes me happier than seeing your culinary creations.
Feel free to leave a comment or a question if something stumps you. I’m here to help, and I’ve probably made every mistake in the book at least once. Remember, the goal isn’t perfection—it’s the love and enjoyment you pour into the process. So gather your ingredients, invite your loved ones, and craft some sweet memories with this chocolate bark valentine’s recipe.
Happy Valentine’s Day, everyone. May your day be filled with warmth, laughter, and plenty of chocolate! Skål (that’s “cheers” in Norwegian) to a day of love, and to the many sweet adventures we’ll share in the kitchen this year.
